
Table Of Contents
- Why Ductwork Matters With A Heat Pump
- Inspect The Existing System
- Check Airflow And Return Capacity
- Seal And Insulate Leaky Ducts
- Match Equipment To The Home
- Prepare For Installation
- Avoid Common Retrofit Mistakes
- Create A Simple Maintenance Plan
- Common Questions About Heat Pump Ductwork
- Final Thoughts
Replacing an aging furnace or central air conditioner with a ducted heat pump can be a practical upgrade, but the equipment is only one part of the system. Your supply ducts, return paths, registers, and connections all affect whether conditioned air reaches each room quietly and consistently. For an example of the type of system that uses a home’s existing air-distribution network, see https://www.mrcool.com/product/central-ducted.
Existing ductwork can often be reused, but it should never be assumed to be ready without an inspection. A high-efficiency heat pump cannot fully compensate for duct leaks, undersized returns, crushed flex duct, or poorly insulated runs in an attic, crawl space, garage, or basement.
1. Why Ductwork Matters With A Heat Pump
A ducted heat pump heats and cools by moving air through supply ducts and drawing air back through return ducts. If the distribution system is poorly designed or damaged, homeowners may notice uneven temperatures, noisy grilles, weak airflow, and longer operating cycles. The system may still run, but comfort and efficiency can suffer.
Leaks matter because conditioned air can escape before it reaches living spaces, especially when ducts travel through unconditioned areas. ENERGY STAR notes that typical homes can lose about 20 to 30 percent of the air moving through duct systems because of leaks, holes, and poor connections. Its duct sealing guidance also identifies mastic and metal tape as suitable sealing materials for accessible duct leaks.
2. Inspect The Existing System
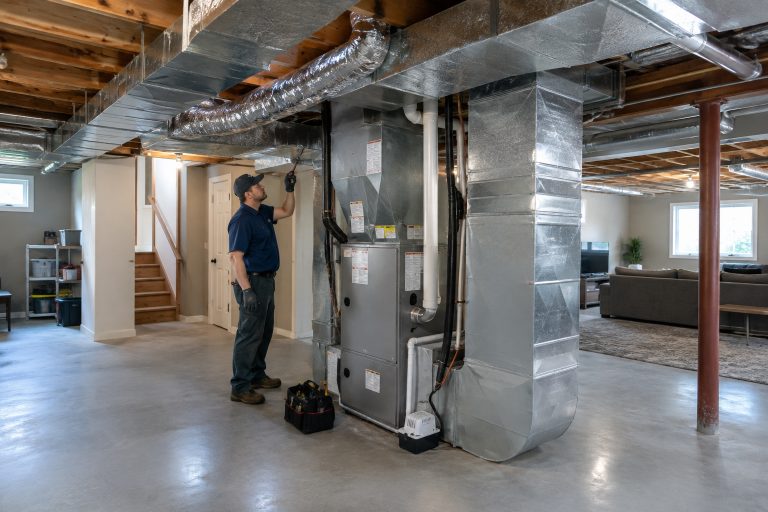
Start with a visual inspection before making decisions about equipment or duct replacement. Some problems are easy to spot, while others may require a contractor to test airflow, pressure, or leakage. Look at every accessible section, including ducts near the air handler, attic runs, crawl-space runs, basement trunks, garage ducts, and connections behind utility closets.
- Check seams, boots, plenums, and branch connections for loose or disconnected sections.
- Look for crushed, kinked, sagging, or sharply bent flexible duct.
- Inspect metal ducts for rust, moisture staining, or damaged insulation.
- Check whether insulation is missing, compressed, or torn.
- Make sure furniture, rugs, and stored items are not blocking supply registers or return grilles.
- Consider whether a renovation added walls, rooms, or layout changes that altered the original duct design.
3. Check Airflow And Return Capacity
Supply registers receive most of the attention, but returns are just as important. A heat pump needs a clear path for air to circulate back to the indoor unit. A home can have plenty of supply vents and still feel uncomfortable if return grilles are too small, blocked, or located where closed doors isolate rooms.
Possible warning signs include whistling grilles, doors that move when the system starts, rooms that become stuffy when doors are closed, loud blower operation, and major temperature differences from one room to another. If the cause is not obvious, ask a qualified HVAC professional to measure airflow and assess static pressure rather than guessing.
4. Seal And Insulate Leaky Ducts
Repairing accessible leaks and restoring insulation are often worthwhile steps before a heat pump installation. Clean dusty surfaces first, then seal joints, connections, duct boots, and accessible plenum seams with approved duct mastic or appropriate foil-backed tape. Ordinary cloth duct tape is not a reliable long-term repair material.
- Identify accessible air leaks and disconnected sections.
- Reconnect and support ducts so they are not pinched or hanging excessively.
- Seal seams and joints after surfaces are clean and dry.
- Replace damaged duct insulation and close gaps around connections.
- Give special attention to ducts located in hot attics, cold crawl spaces, garages, and unfinished basements.
5. Match Equipment To The Home
Do not select a heat pump based on square footage alone. Heating and cooling demand also depends on insulation levels, window area, air leakage, ceiling height, solar exposure, local climate, occupancy, and duct condition. Oversizing is not a cure for weak airflow or leaky ducts.
Ask the contractor for a Manual J load calculation, which estimates the home’s heating and cooling requirements. ENERGY STAR explains that properly sized equipment is important for comfort and performance, and that contractors should use to help determine the right system capacity.
6. Prepare For Installation
A little preparation can help the installation move smoothly and make duct-related recommendations easier to evaluate. Clear a path to the indoor equipment and remove stored items near duct connections, the electrical panel, and the planned outdoor-unit location.
- Protect fragile belongings from dust and vibration.
- Confirm thermostat placement before work begins.
- Ask how condensate drainage will be routed and maintained.
- Confirm whether electrical work, permits, or inspections are needed.
- Request a written explanation of any proposed duct repairs, added returns, or register changes.
7. Avoid Common Retrofit Mistakes
One common mistake is installing new equipment before evaluating the duct system. Others include choosing a larger unit to offset poor comfort, closing multiple supply registers to fix one difficult room, overlooking return-air shortages, and skipping final airflow verification. Closing registers can increase resistance in the system and may not solve the underlying issue.
8. Create A Simple Maintenance Plan
Duct preparation is not a one-time concern. Check filters before heating and cooling seasons, keep supply and return grilles open, and listen for new rattling or whistling sounds. Also watch for rooms that begin to feel noticeably warmer, cooler, or less comfortable than usual. A sharp change in run time, energy use, or airflow is a good reason to schedule professional service.
9. Common Questions About Heat Pump Ductwork
Can Existing Ductwork Be Used With A Heat Pump?
Yes, when it is in sound condition, properly sized, sealed, insulated where needed, and capable of moving sufficient airflow. An inspection should determine whether repairs or modifications are necessary.
Does Every Installation Require New Ducts?
No. Some homes only need targeted sealing, insulation repairs, improved support, additional return capacity, or limited layout changes. Full replacement may be appropriate when ducts are extensively damaged, inaccessible, or fundamentally inadequate.
What Happens If Ducts Are Too Small?
Restricted ducts can contribute to weak airflow, noise, room-to-room comfort problems, and added strain on the blower. The proper solution depends on measured system performance and the home’s layout.
Final Thoughts
Ductwork is part of the heating and cooling system, not an afterthought. Inspecting it carefully, correcting accessible leaks, protecting it with insulation, verifying return capacity, and selecting equipment through a real load calculation can help a new heat pump provide more dependable comfort for years to come.